





Quick Answer
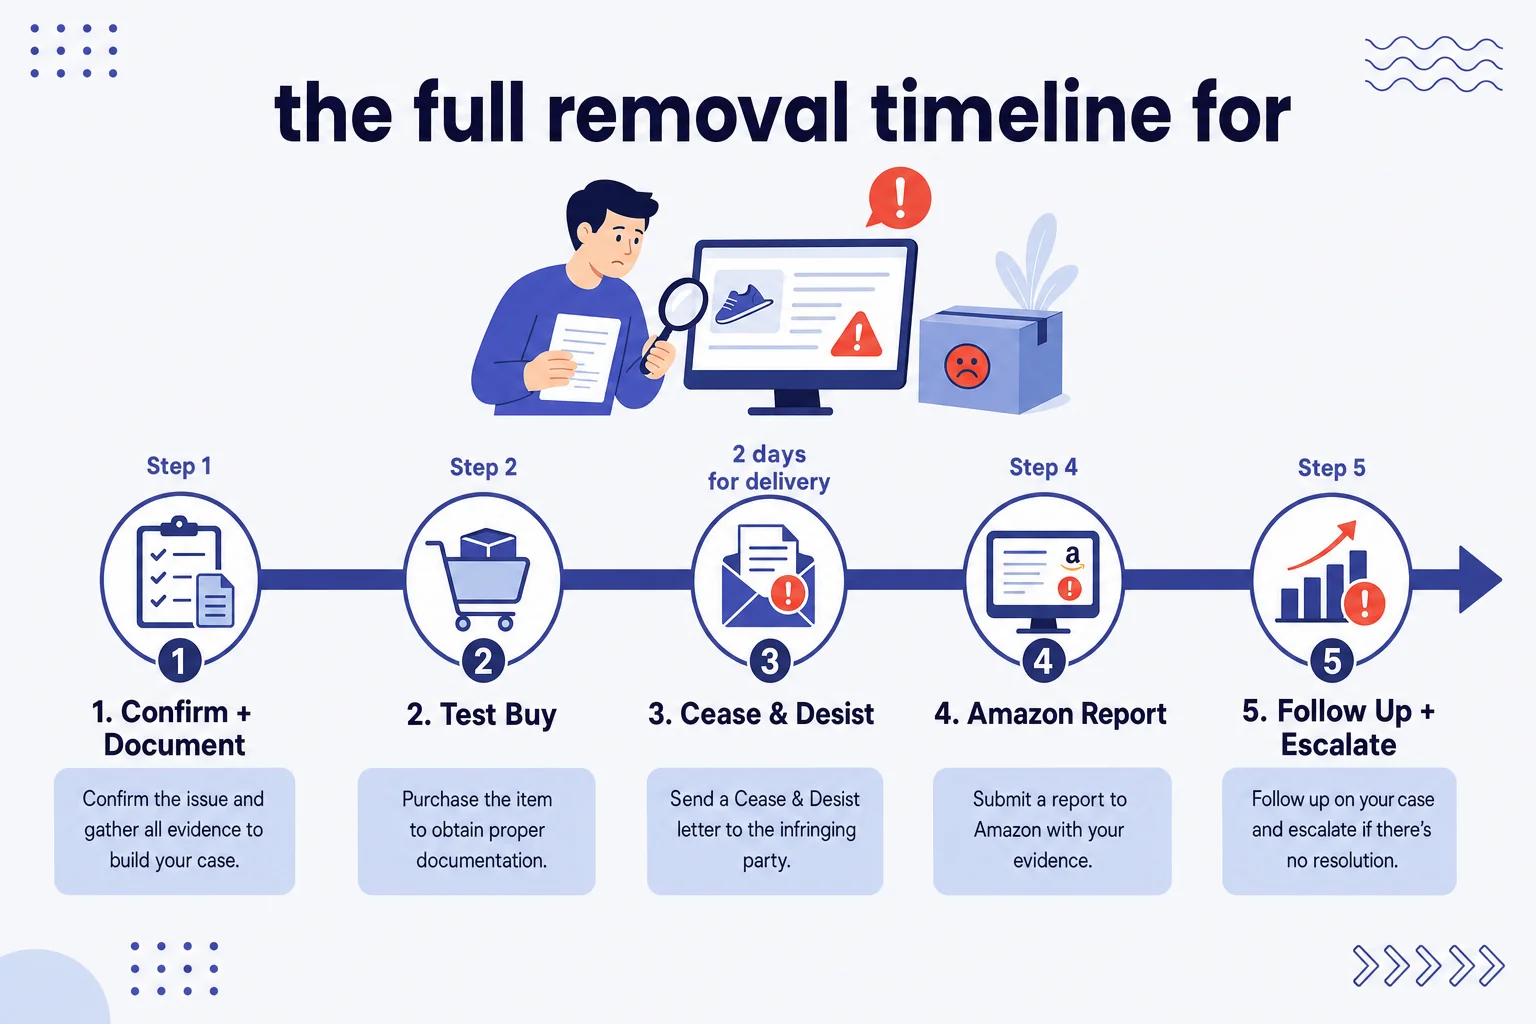
To remove an Amazon hijacker, follow a five-step playbook: confirm the hijacker, document evidence, send a cease-and-desist through Amazon’s Contact Seller flow, file a violation report with Amazon (Brand Registry path if available), and follow up with escalation if needed. Most amateur hijackers disappear quickly once a well-evidenced report lands. The biggest factor in speed: how fast you started after the hijacker appeared.
Key facts:
– Brand Registry IP violation reports resolve fastest when your evidence is strong
– Many amateur hijackers disappear after a cease-and-desist alone, before Amazon involvement
– Every hour a hijacker holds the Buy Box is revenue going to someone else
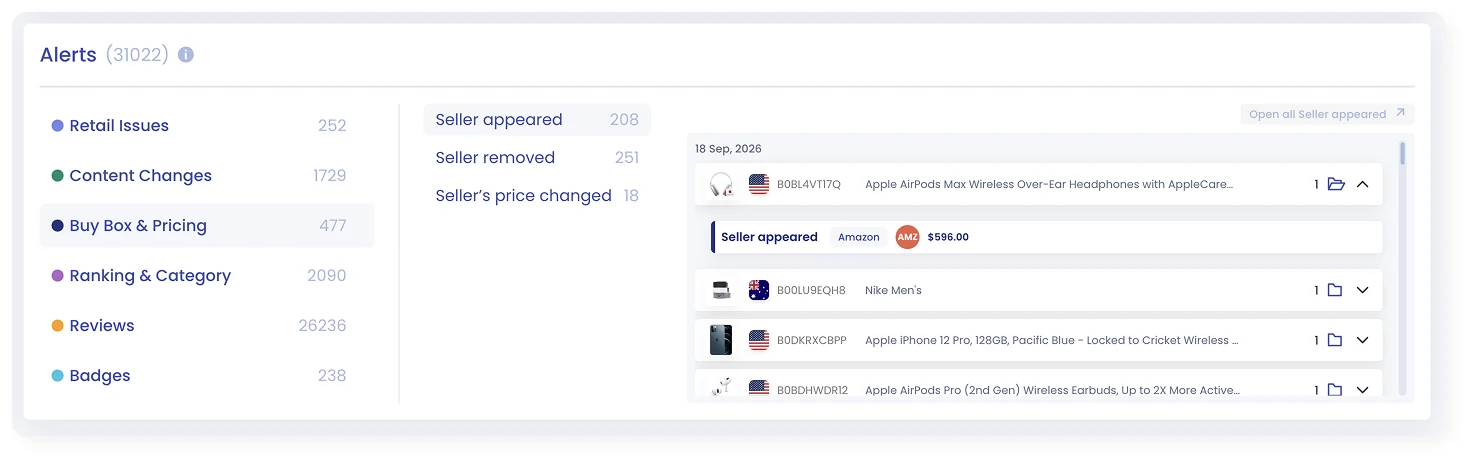
– Real-time alerts cut detection from days to minutes
Saturday, 6 AM. A SellerSonar customer’s phone buzzed with a hijacker alert on her best private-label ASIN, and the seller who had latched onto her listing had been there since 4:47 AM. She made coffee, opened the laptop and started the playbook.
By 8 AM the evidence was saved, the cease-and-desist was sent and the report was filed. By Sunday afternoon the hijacker was gone, and she had lost about 30 hours of Buy Box instead of five days.
Closing that gap is the whole job. Removal isn’t complicated, but it is time-sensitive, and most sellers have no playbook the first time it happens.
About the Author: The SellerSonar editorial team writes about Amazon monitoring, brand protection and incident response. From what we see daily, the difference between a four-hour removal and a four-day one is almost always whether the seller had monitoring running before the hijacker arrived.
Confirm you actually have a hijacker (quick check)
Before you fire off cease-and-desists, take 2 minutes to confirm what you’re dealing with. Four signals usually mean a hijacker.
Sign 1. A seller you never approved. Open your product detail page and click the “Other Sellers on Amazon” section. If a name appears that you didn’t authorize, you have a candidate.
Sign 2. Sudden Buy Box loss with no explanation. Your metrics are fine, your price is competitive and you are in stock, and yet the Buy Box has vanished anyway. That’s a hijacker undercutting you.
Sign 3. Sudden reviews complaining about quality. “Cheap plastic,” “nothing like the photos,” “looks fake.” Someone shipped junk under your ASIN, and those reviews are now stuck on your listing.
Sign 4. An unexplained collapse in sales. No algorithm change, no stockout, no season, and yet sales fell off a cliff. Usually that’s a hijacker holding the Buy Box and taking the traffic you paid for.
For background on how hijacking works and how to prevent it, see our prevention guide. This one is the removal playbook for sellers already in incident mode.
One important difference: an authorized reseller is not a hijacker. If you sell wholesale and a distributor lists on your ASIN, that’s expected, so check the seller isn’t a partner you’ve forgotten before you send anything.
💡 Expert Tip: Check the hijacker’s profile before you act. A new account, low feedback, a thin storefront or a randomly generated name are all fingerprints. Click their seller name from your product page; it takes 30 seconds.
The first hour matters (why speed wins)
Hijacker math is brutal. A month-long incident on a normal private-label seller costs more than a whole year of monitoring software from any of the big tools, while a one-day incident barely shows up in the numbers at all. What decides which one you get is how fast you started.
The seller above had alerts, which is the only reason her incident lasted 30 hours. Another customer the same quarter had none: she spotted an identical attack on Wednesday while reviewing dashboards, by which point the hijacker had been live since Friday. Lost Buy Box, three one-star reviews, a ranking slide.
Same playbook both times. The difference was five days of lag. Check listings by hand and you catch hijackers whenever you happen to look; run monitoring and you catch them when they arrive.
Step 1: Document everything (evidence checklist)
Before anything else, capture evidence. How quickly Amazon acts depends heavily on how much proof your report carries, and the ten minutes you spend here will save you days of back-and-forth later on.
Capture all of this:
- Screenshot the “Other Sellers on Amazon” section showing the hijacker’s name, price, and offer details
- Screenshot the hijacker’s seller profile: storefront, feedback score, joined-Amazon date, return address if visible
- Note in writing: hijacker seller name, listing date and time you found it, current price, feedback count, any other identifying details
- Save HTML/PDF copies of the relevant pages in case the hijacker disappears mid-process (they often do, which is good for you but bad for evidence preservation)
- Capture your authentic listing at the same moment: title, bullets, images, price. Useful for the “this is mine, that’s not” comparison
This evidence packet does two jobs. It strengthens your Amazon report (reports with evidence get acted on faster). And it creates a legal record if you eventually need to engage an IP attorney.
Step 2: Do a test buy (counterfeit evidence)
If the hijacker’s price is significantly lower than yours, they’re almost certainly selling a counterfeit. A test buy gives you photographic proof, which is the single strongest evidence type for an Amazon IP violation report.
How to run a test buy:
- Use a different Amazon account (a friend’s, a partner’s, or a fresh one) so the order routes to the hijacker, not your authorized listings
- Make sure their offer wins the Buy Box at order time so you receive their product, not yours
- Once it arrives, photograph the product, the packaging, the shipping label, and any included inserts
- Set the counterfeit side-by-side with your authentic product. Photograph the differences. Logo placement, material quality, packaging differences, missing safety inserts, color variation, anything
A test buy is a recoverable business expense and the evidence is irreplaceable. We’ve seen reports without it sit for days, then move in hours once side-by-side photos were attached.
🎯 Pro Insight: Photograph the packaging before you open anything. Many sellers unpack first, then realise the box already went in the recycling, and packaging differences are often the clearest proof you’ll get.
Step 3: Send a cease and desist (template inside)
Plenty of amateur hijackers vanish after a well-written cease-and-desist message sent through Amazon’s Contact Seller flow. The cost is five minutes and nothing at all. Send the letter before reporting to Amazon; it sometimes ends the incident in hours and removes the need for the full report.
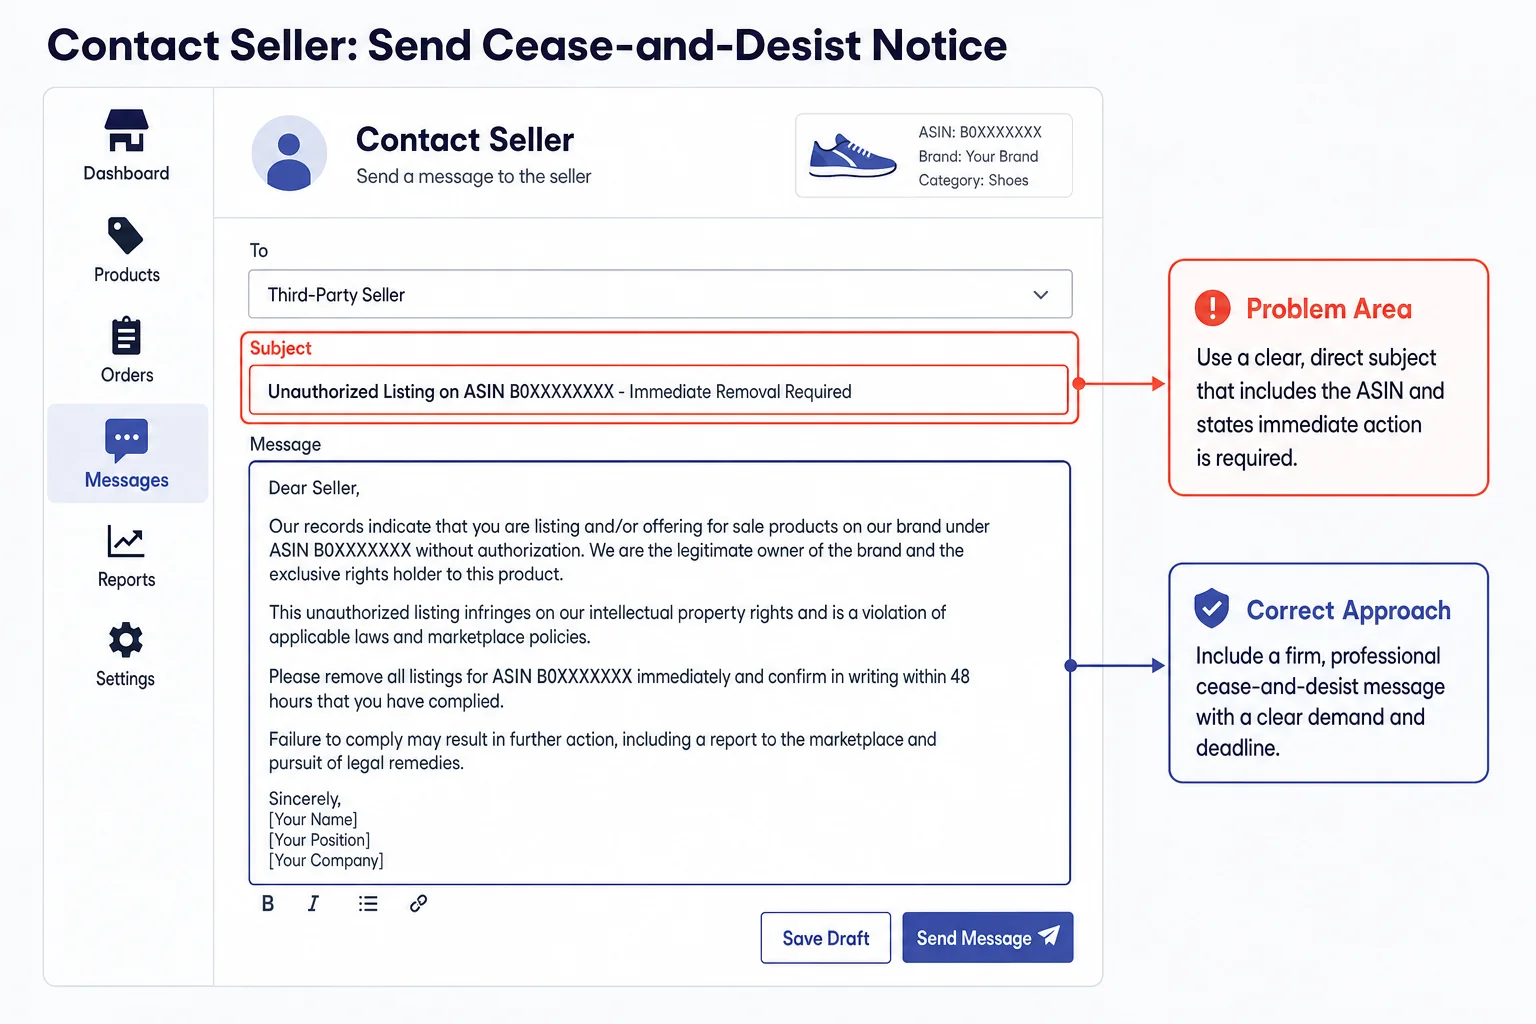
How to send it:
- Go to the hijacker’s seller profile (the same profile you screenshotted in Step 1)
- Click “Ask a Question” or “Contact Seller”
- Paste the template below, edit the bracketed fields, send
Cease-and-desist template (copy-paste, edit the bracketed parts):
Subject: Unauthorized Listing on ASIN [your ASIN]: Immediate Removal Required
You are currently selling on ASIN [your ASIN], which is a trademarked private-label product sold exclusively by [Your Brand Name]. This listing and its trademark are owned by [Your Brand Name / Legal Entity].
Your offer constitutes an unauthorized use of our trademark and likely a sale of counterfeit goods. We are documenting your offer, your seller profile, and your inventory practices for an Amazon Brand Registry violation report and possible legal action.
Remove your offer from ASIN [your ASIN] within 24 hours of receipt of this message. Failure to comply will result in:
- A formal trademark violation report filed with Amazon Brand Registry
- A test purchase of your counterfeit inventory for evidentiary documentation
- Referral to our IP counsel for further legal action including damages claims under [applicable trademark law in your jurisdiction]
Confirm removal in reply to this message. We will verify within 24 hours.
[Your Name] [Your Title] [Your Brand Name] [Date]
Realistic expectations: Some hijackers ignore the letter. Some respond with denial or stalling. About a third disappear within 24 hours because they’re running a quick counterfeit side hustle and don’t want the heat. Either way, the letter puts a removal demand on the record, and that makes the Amazon report you file next a good deal stronger.
A SellerSonar customer ran the playbook in May. She sent the cease-and-desist at 2:14 PM on a Tuesday through Amazon’s Contact Seller flow. The hijacker removed their offer at 8:37 PM the same day.
Six hours, no Amazon report needed. Not every case ends this clean, but the letter is the cheapest move you can make.
Step 4: Report the hijacker to Amazon (Brand Registry + standard paths)
If the cease-and-desist doesn’t resolve it within 24 hours, file a formal report. Two paths exist depending on whether you have Brand Registry enrollment.
Path A: Brand Registry (fastest, recommended)
Brand Registry’s IP violation reporting is the most effective removal path. Here’s the exact route:
- Log into brandservices.amazon.com
- Navigate to Brand Protection > Report a Violation
- Select the violation type (typically “Counterfeit” or “Inaccurate Information”)
- Enter the ASIN in question
- Identify the offending seller using the seller name from your Step 1 evidence
- Attach: trademark certificate, screenshots from Step 1, test-buy photos from Step 2, your cease-and-desist message
- Add a brief written description: “Unauthorized seller [name] listing counterfeit goods on our trademarked ASIN. Cease-and-desist sent 2026; no compliance.”
Brand Registry violations resolve fastest when evidence is strong. Reports go through Amazon’s Report a Violation tool, which walks you through a structured form and tracks status in a Submission History tab, and they route to Amazon’s IP enforcement team rather than general support, which is the practical reason it moves faster than the standard path.
Path B: Without Brand Registry
If you’re not Brand Registered, you can still file. The path is slower and acceptance rates are lower, but it works.
- Go to Seller Central > Help > Get Support > Report a Violation
- Select the appropriate violation category
- Enter ASIN, offending seller name, and evidence summary
- Attach the same evidence packet
Standard Report Abuse submissions move more slowly. Without trademark paperwork backing the report, Amazon often requires a second round of evidence. Plan for at least one follow-up cycle.
📌 From Our Experience: From what we see at SellerSonar, the single biggest predictor of fast Brand Registry removal isn’t the evidence type. It’s whether the report tells Amazon WHAT they’re looking at in the first 50 words. Long, anxious write-ups get queued behind everything else. Short, structured reports (“Counterfeit listing. Seller [name]. Test-buy evidence attached. Trademark cert attached.”) get acted on. Lead with the bottom line.
Step 5: Follow up and escalate
If nothing has moved after three days, escalate. Hijackers count on sellers giving up.
Day 3 (no response): Send a follow-up report with any more proof you have, whether that’s a second test buy, more customer complaints, or screenshots showing the hijacker is still there. Quote your original case ID.
Day 7 (still active): Escalate through Amazon Account Health Support. Open a ticket that names your earlier report and asks for a status update, because Account Health can see into the IP queues and standard support cannot.
Day 10+ (stuck case): This is when an IP attorney earns their retainer. A cease-and-desist on legal letterhead carries weight a DIY message doesn’t, and the threat of actual litigation usually ends it. Ask about cost up front, since seller IP firms often do flat-rate removal packages.
Amazon’s IP team works through queues, and sellers who keep showing up get moved along faster than the ones who wait quietly. Re-engage every few days.
When the hijacker comes back
Repeat offenders use the same playbook against you, just with a new seller account. Three patterns to watch for:
Same person, new account. Look at the new seller’s account creation date, location, business name spelling pattern, and storefront design. Counterfeiters often run several accounts off the same outfit. Document the pattern: “This is the third hijacker on this ASIN in 6 weeks; accounts created [dates]; same product photos in storefronts.”
Different person, same supplier. Sometimes the first hijacker sells the counterfeit line on to someone else, and you get the same fight with a new name on it. Same response works.
Coordinated swarm. Rare but real. Several hijackers attach at once, hoping you can’t keep up. Treat it as one incident and report every offender in a single Brand Registry submission with a pattern note.
For chronic-target SKUs, the right long-term answer is Amazon’s Transparency Program or Amazon Project Zero. Every Transparency unit carries its own code, and Amazon scans that code before the unit ships. No code, no shipment.
The cost per unit is real but small next to one long incident. A skincare brand we worked with spent six weeks clearing the same three hijackers, enrolled, and never saw another counterfeit ship under their ASIN.
💡 Expert Tip: Log every incident in a spreadsheet: date found, seller name, account age, time to removal, root cause. After three or four you’ll see the pattern, and the pattern tells you whether to enrol in Transparency or live with the odd incursion.
Watch marketplaces you don’t sell in
Getting a hijacker off Amazon.com doesn’t clear them off Amazon.de, Amazon.co.uk or Amazon.com.mx. The same counterfeit stock often reappears under your ASIN in a marketplace you’ve never opened, and because you don’t sell there, nothing in your normal routine will ever put it in front of you.
SellerSonar’s SharkGuard covers that blind spot. It watches your ASINs across Amazon marketplaces where you do not currently sell and flags it when your product turns up on one of them. You then check who’s behind the offer: your own expansion, an approved reseller, or someone with no right to the listing. If it’s the last one, you restart this playbook at Step 1 with a head start, instead of finding out months later through a one-star review in a language you don’t sell in.
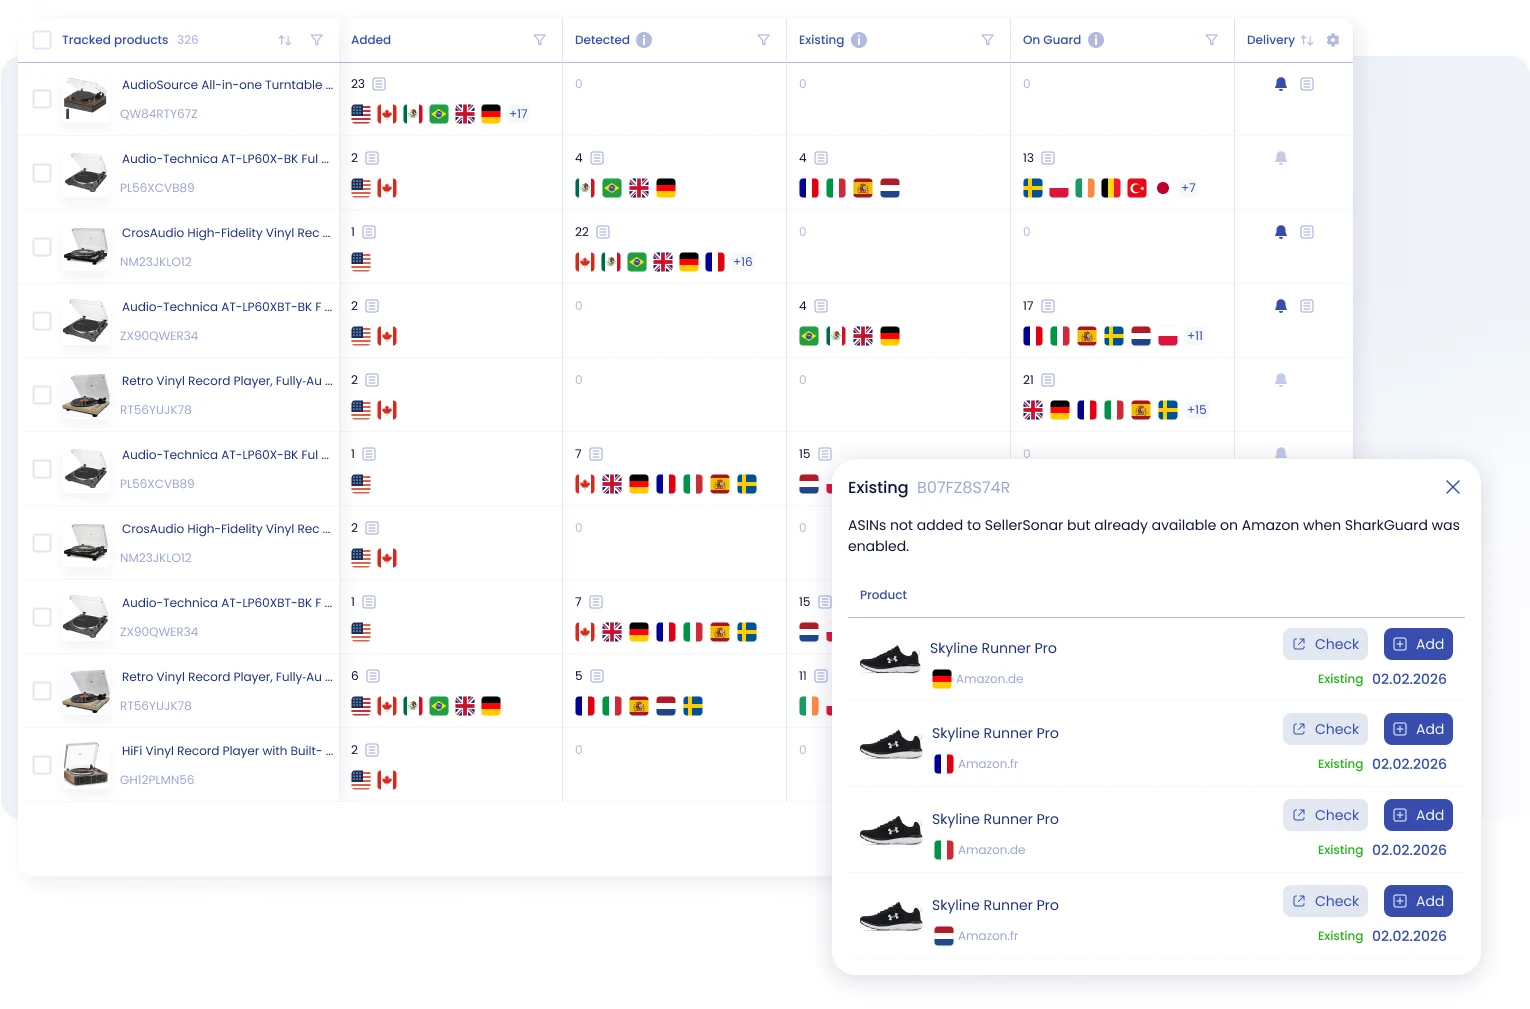
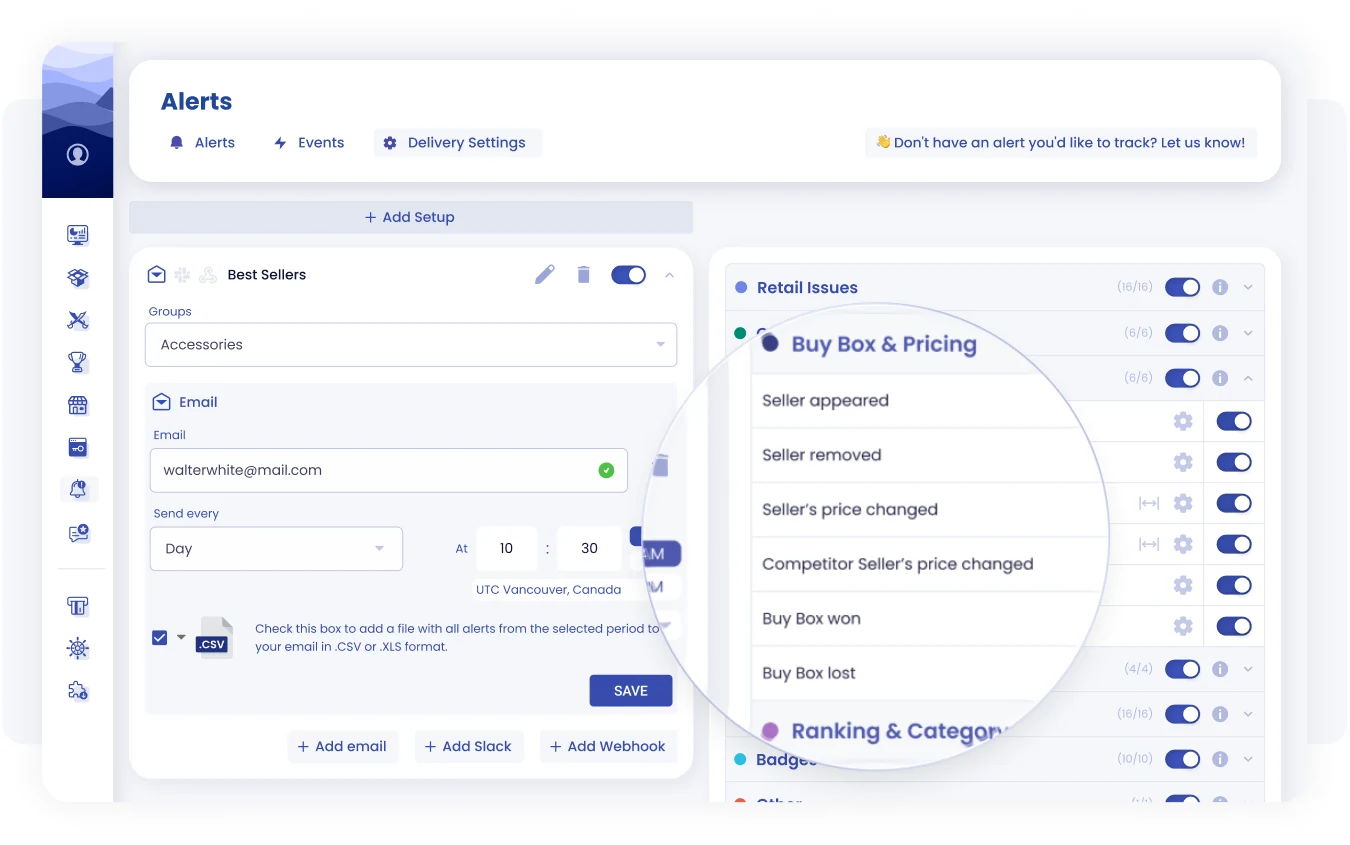
The dashboard splits every tracked product into what you added yourself, what SharkGuard detected, what already existed on other marketplaces when you switched it on, and what it’s actively guarding. Alerts reach you by email, Slack or webhook, the same way the rest of your alerts do.
After you remove the Amazon hijacker: lock down the listing
Removing the hijacker is half the job. Stopping the next one is the other half, and that is its own piece of work rather than a footnote to this playbook.
The full prevention system is in our Amazon brand protection guide, which covers Brand Registry, Transparency Program, monitoring strategy, and how to build a brand protection system that holds. The two pieces work together: this playbook handles the urgent removal layer; the brand protection guide handles everything that prevents the next incursion.
In short, after removal, set up hijacking alerts so the next attack gets caught in minutes, not days. Then work through the prevention pillar at your own pace.
Bottom line
Removing an Amazon hijacker is a five-step playbook, not a panic. Confirm. Document. Cease-and-desist. Report. Follow up. The mechanics are simple, and the only thing separating a 30-hour incident from a five-day one is how quickly you noticed and got started.
A few things worth holding onto:
- The first hour matters more than any other. Detection is the gate. Without alerts you’re hours or days behind; with them, about half an hour, which is usually fast enough.
- Evidence quality drives Amazon removal speed. A well-evidenced Brand Registry report moves. A vague one sits.
- The cease-and-desist is the cheapest move. Five minutes, no cost, and it works often enough on amateurs to be worth doing first.
- Repeat offenders need a structural fix. Transparency ends the cycle on SKUs that keep getting hit.
- Post-removal lockdown is half the job. Manual monitoring doesn’t scale; automated alerts do.
Final Expert Recommendations:
The sellers who never treat hijacking as a crisis are the ones who set monitoring up before they needed it. The first hijacker is always the expensive one, because you’re learning the system while the meter runs. The second is a four-hour task.
Want hijacker alerts running before the next incident? Start a free 14-day SellerSonar trial and monitor 5 ASINs, no credit card. If a hijacker lands on a tracked ASIN you’ll know within minutes, which is enough lead time to run this playbook before the damage adds up.

